Owning a record collection can say a lot about us, how we think, and what’s most important in our lives, and as audiophiles, we don’t want to just hear the music; we want to feel it. That’s why we go out of our way to buy vinyl records. Unfortunately, having to clean and maintain them can sometimes spoil the fun.
The best way to clean and care for vinyl records is to use a holistic approach. Combining cleaning techniques such as washing, brushing, and ultrasound will give you the best chance to clean and preserve even the dirtiest mold-laden selections from local thrift stores.
In this guide, we show you what’s available to clean your vinyl records. We’ll give you some useful tips and strategies to utilize what you have on hand. And we’ll also offer up some ideas on how to keep your precious vinyl looking and sounding great for many more years.
Microfiber Cleaning Cloths
These supersoft microfiber towels help keep dust and dirt off your vinyl records. Make sure to select a cloth that is static-free to limit dust particle buildup.
A good choice is the Gartopvoiz Anti-Static Microfiber Towel. They’re great for dusting quickly between each use or as a soft, lint-free cloth for deep cleaning and drying.
For a more thorough job, use a commercial Vinyl record cleaner such as Lasermedia Vinyl Record Cleaning Solution. The secret to this and other top-quality cleaners is that they use only the best water sources. It is purified further through micron-filtering and other processes so that no contaminants find their way onto your vinyl.
You Can Make Your Own Cleaning Solution
Follow these simple steps:
- Pour one tablespoon of rinse agent into an eight-ounce spray bottle.
- Fill the bottle ¾ full with distilled water. Do not use tap water!
- Fill the remainder of the bottle with alcohol that is at least 90% pure.
How To Deep Clean Your Vinyl Using Microfiber Cloths
To deep clean vinyl using microfiber cloths, follow these steps:
- Spray a small amount of cleaner directly onto the vinyl surface. Be careful not to soak the label.
- Wipe gently with a dry microfiber cloth, making sure to wipe away toward the outer edge, which will ensure there is no residual dirt buildup in one area.
- Let the record air dry on a drying rack or dish strainer before putting back in its sleeve.
Cleaning Mitts
To clean both sides of your record at the same time, use a cleaning mitt. They can also double as a record handler, so you will never again have to worry about getting oily fingerprints on your records when you pick them up.
They come in all shapes and sizes and are made of either microfiber cloth or some other lint-free material. For example, the Hudson Hi-Fi Three-Pack has a soft, microfiber material on the inside and a rigid construction outside. You get optimal cleaning on both sides while being able to hold the record firmly in place.
Soft Cleaning Brushes
If you’re just looking for a quick and easy way to dust your records off before you retire them to their sleeves, then the Douk Audio Soft Cleaning Brush is an excellent solution. The brush is made of a natural material and has antistatic properties to prevent dust buildup.
How To Use a Soft Brush To Clean Your Vinyl
Follow these steps:
- Make sure the brush is free of dirt or debris before use.
- Put your record on the turntable and begin to spin it at its normal speed.
- Gently place the brush on the vinyl and work outward toward the edge.
Carbon-Fiber Record Cleaning Brush
Deep into the grooves of your favorite vinyl record lies dust and dirt buildup, which can severely alter its sound quality. That’s why we highly recommend the Boundless Audio Carbon Fiber Anti-Static Record Brush. It should be on every record enthusiast’s shelf.
Carbon-fiber is highly conductive, which means that it can pick up dirt and dust better than most other brushes due to its attraction to static electricity.
Here are a few of the Boundless Record Brush’s many great features:
- Two rows of carbon fiber bristles for deep cleaning
- Easy self-cleaning feature
- Good quality construction
- 100% manufacturer money-back guarantee
How To Use a Carbon-Fiber Brush to Deep Clean Your Vinyl Records:
To deep clean vinyl records using a carbon-fiber brush, follow these steps:
- Spin your record on the turntable at normal speed.
- Tilt the handle forward to use the front row of brushes first.
- Set the front bristle down onto the vinyl for about three to four revolutions.
- Tilt the brush back so that the rear bristles touch the vinyl for three to four rotations.
- Carefully sweep the brush to the side and off the record for a deep, thorough cleaning.
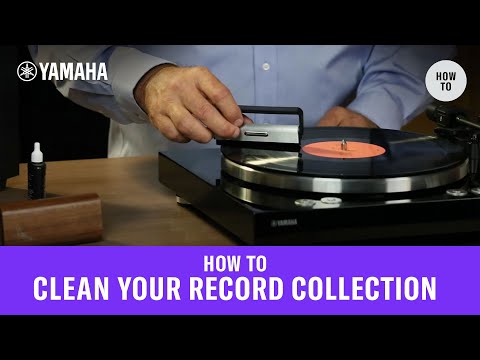
Check out this great video for a complete demonstration:
Cleaning Rollers
If you are looking to quickly remove dust and dirt from deep within the grooves of your records, look no further than Vinyl Buddy record cleaner. It is a small roller device you set on your vinyl. You can then roll it over the surface to remove dust and dirt particles.
Although the surface is sticky, there are no harsh adhesives or chemicals present on the roller. It is safe for vinyl, easy to wash, and completely reusable. The downside of this product is, it will lose its adhesive properties after several uses.
Nagaoka, one of Vinyl Buddy’s largest competitors, recently entered the market with their CL 1000 Rolling Record Cleaner. It works on the same principle as the Vinyl Buddy but is supposed to last much longer.
The manufacturer claims that the CL 1000 is a revolutionary breakthrough in terms of value and performance. It utilizes a superior grade of rubber elastomer that rarely loses its original surface tackiness, so they tell us.
Still, the Nagaoka CL 1000 is very expensive. For the difference in cost, you may as well replace the Vinyl Buddy as needed.
Milty ZeroStat 3 Gun
Cleaning your records with any object, including rags and brushes, is problematic since there can be a significant amount of static buildup during the process. The result is even more dust and dirt present on the vinyl.
The Milty ZeroStat 3 Anti-Static Gun solves that for you by eliminating static on the surface of your records. It does that by sending a small positive charge to it. With a slow squeeze of the handle, it reverses the charge, eliminating the static electricity on the vinyl’s surface.
The key to success with the device is a slow, steady squeeze of the handle. If you go too fast, the gun will tell you by producing a clicking sound. It seems complicated initially, but once you get used to the process, it’s relatively easy to use.
No-Static Record Cleaning Arm
This fantastic accessory for your turntable resembles a classy-looking tonearm. It cleans your records as you listen with the help of a small carbon-fiber brush attached to the end. It also removes static buildup on your vinyl with the help of an attached grounding wire.
The one that leads the pack, and is the easiest to find, is the Sleeve City Anti-Static Record Cleaning Arm. It’s relatively simple to set up and helps keep your records dust-free, clean, and static-free, all while playing your favorite tunes.
How To Set Up Your Anti-Static Cleaning Arm
Steps for setting up the anti-static cleaning arm:
- Connect the grounding wire to the turntable. Use the same grounding screw that grounds the turntable to the amplifier.
- Take the base of the antistatic arm and position it so that the arm can reach the entire record radius without interfering with the tonearm.
- Once you’ve found the ideal spot for the base, install the grounding wire, remove the adhesive on the bottom, and set the base firmly into place.
- Loosen the height adjustment screw and place the antistatic arm on the base.
- Adjust the antistatic arm by raising the base’s fulcrum until the component is almost level, with the brush end slightly lower than the back of the arm.
- Balance the antistatic arm by first making sure the small weight is all the way back. Spin the larger counterweight until the arm balances in a level position.
- Slide the small weight forward until the brushes are flexed slightly on the record.
- The antistatic arm will track at the same rate as the tonearm. If it track’s too fast, reduce the weight. If it doesn’t follow quickly enough, increase the weight.
- When using the tracking arm, drop it before you drop the stylus and lift it after your stylus.
When properly installed, your antistatic cleaning arm grounds your records to remove static while keeping dust from settling on the vinyl.
Vinyl Record Washers
Instead of submerging your precious collection under running tap water, which is something you should never do, these handy record washers clean your records safely. If you want to get both sides of your vinyl clean without using your turntable, the Spin-Clean Record Washer is for you.
This non-powered washing machine for vinyl records works manually. You simply set the record into the basin of the supplied cleaning fluid mixed with distilled water. You then turn it three to four times in each direction. The brushes in the middle pick up dirt and debris and send it down to the bottom of the tank. Close the lid, and you are ready to store it for later use.
The spin-clean works on 33, 45, and 78 records. The rollers are simple to adjust and will accommodate each size.
The Spin-Clean is mostly ready-to-use. You just take off the lid, set the rollers and brushes, and away you go. It comes nicely packaged with the following items:
- Washing basin with lid
- One pair of rollers
- One pair of brushes
- Two lint-free cloths for drying
- Alcohol-free cleaning solution
Washing Your Record
Here are the steps to follow for washing your vinyl with the Spin-Clean washer:
- Adjust the rollers for the size of the record you are washing. The grooves are marked to make it easy for you.
- Fill the basin to the prescribed level with distilled water. Do not use tap water!
- Add a capful of cleaning fluid (included) to the water.
- Insert the record.
- Slowly rotate the record three times one way and three times the other way.
- Dry the record using a lint-free towel (included).
Won’t the Label Get Wet?
As long as you set the rollers correctly and don’t overfill the basin, the labels will remain dry during the washing process. Still, it’s best to be careful when drying the vinyl. You want to wipe away from the middle, out toward the edge of the record, to avoid pulling the water in toward the label.
Is There a Better Value Alternative?
The Knox Gear Vinyl Record Cleaner is about half the cost of the Spin-Clean version. It includes the same essential items, such as:
- Wash Basin with lid
- Rollers
- Cleaning brushes
- Cleaning fluid
- Microfiber cloth
- Drying cloth
The neat thing is that it also comes with a drying rack. You can quickly air dry your records instead of having to towel them off after you wash them.
The downside to the Knox record cleaner is that the cleaning solution it comes with contains alcohol. And for some audiophiles, this is entirely unacceptable.
But there’s an easy fix: Use Lasermedia’s VNC-8 Cleaning Solution instead. It is alcohol and ammonia-free.
Home Record Cleaning Machines
Home record cleaning machines are generally less expensive than their commercial counterparts. The main difference is the mechanism by which the cleaning takes place.
Most home cleaning machines utilize a vacuum system to suck dust and dirt from the deep, recessed grooves in the vinyl. Commercial cleaning machines use ultrasound frequency technology. We will discuss this type of device later.
One of the more popular machines on the market today for home use is the Record Doctor Cleaning Machine. We recommend it for its ease of use and good overall results. It is a wet/dry manual cleaning system that involves a two-stage process.
You first go over one side of the record with a brush and cleaning solution. You then flip it over and allow the vacuum to suck up all the liquid and dirt. You then repeat the process for the other side.
Cleaning Your Vinyl With the Record Doctor
Follow these basic steps:
- Place the record on the record platter.
- Place the record turner on the spindle.
- Apply a thin line of cleaning solution directly onto the record, working from the outside label to the rim.
- Use the applicator to spread the cleaning solution while manually rotating the record.
- Turn the record over, wet side down.
- Switch the vacuum to the on position.
- Using the record turner, rotate the record two to three times until it is dry.
- Repeat the process on the other side.
It’s worth noting that the felt that lines the vacuum slot lightly touches the record as it spins. For that reason, it is best to keep it free of dirt and debris. Keeping it covered while not in use will help.
Ultrasonic Cleaning Machines
These high-tech record cleaning machines use ultrasound to disrupt and agitate a special cleaning solution resulting in high-impact, deep cleaning of the vinyl surface. Even though it is incredibly effective, it is also very safe.
One of the lower-end models for home use is the DK Sonic Ultrasonic Cleaner. Even though it is relatively affordable, it comes with some nice features. For example:
- Made from corrosion-resistant materials
- Digital timer
- The heating unit can be adjusted incrementally
- Two cleaning settings: 28KHZ and 40KHZ
- Large LED displays
It’s available in several sizes. We recommend the 6 liter unit for single record cleaning and the 8 liter model to simultaneously clean multiple records.
How To Use an Ultrasonic Cleaner
Here is a step-by-step guide for using your Ultrasonic cleaner:
- Mix about 10-20 drops of a record cleaning concentrate like SDessentials TergiKleen with 1 gallon of distilled water. Shake the bottle well to get the proper mixture of water and cleaning solution. You will need between 1/12 to 2 gallons to fill the tank.
- Anchor the record cleaning attachment if it is not already attached.
- Set the records up with the spacers according to how many you want to clean.
- Clip the record spindle to the attachment arm of the motor.
- Lower the records into the tank, being careful not to submerge the labels.
- Set the rotating motor to 3 revolutions for 10 minutes of optimal cleaning.
- Turn the rotating motor to the on position. Then turn the ultrasonic cleaner on and set the timer for 10 minutes.
Drying Your Records
After the timer goes off, lift your records out and detach them from the cleaning arm. Dry each disc one at a time by placing them on a microfiber towel and folding one side over to gently pat dry. Next, place them on a drying rack to complete the drying process.
Commercial Record Cleaning Machines
It’s worth mentioning here that there are some very expensive cleaning machines on the market. They are usually reserved for those who make their living preserving and selling used vinyl records.
Our favorite is the iSonic Motorized Ultrasonic Record Cleaner. It is undoubtedly the granddaddy of all record cleaners. And it has a very hefty price tag to go with it.
There’s no need to purchase a separate attachment to load the records on. It comes complete with everything you need.
The best thing about this unit is, it’s ready to go right out of the box. There’s no assembly required.
Second place goes to the Happybuy Ultrasonic Cleaner. It, too, comes complete with a record rotating arm.
Although there is some assembly required, it is straightforward and easy to put together. For the price, it is quite a remarkable value.
Is There Value in Purchasing Cleaning Kits?
There are several kits available that offer decent value. For example, the Big Fudge Record Care system has many items for basic cleaning of your records. For example:
- Velvet record brush
- Cleaning liquid
- Stylus brush
- Travel pouch
The Hudson Hi-Fi Vinyl Record Cleaning Kit is another great option. It includes:
- Microfiber cloth
- Cleaning solution
- Label protector
- Stylus cleaner
- Velvet record cleaner
- Cleaning mitt
- Carbon fiber brush
Buying all these items in a kit instead of one thing at a time will save you money. But you may have to sacrifice a bit of quality as a result.
Combining Cleaning Techniques
If you’ve ever had to clean a very disgusting record with excessive dust, dirt, or mold on it, you know how frustrating it can be to get it back to playable condition. Here, we want to show you how to combine a few techniques to clean even the nastiest vinyl.
- Run it through your ultrasonic machine at about 30°C (86°F), just enough to warm the record without damaging it. Set the rotation to three revolutions per minute. Between 10-20 minutes should suffice.
- Rinse your record using the Spin-Clean Record Washer. Use only distilled water without any cleaning solution, which will ensure the vinyl gets a thorough rinse.
- Place the record on the Record Doctor and turn on the vacuum.
- Using the turning knob, rotate the record two to three times until it is dry.
- Repeat on the other side.
You should now have a meticulously clean vinyl surface. And although the process will not remove scratches, it will give you at least a chance of making it playable again.
A Few Tips for Keeping Your Vinyl Looking and Sounding Good
Here are some expert tips on how to keep your records in good condition:
- Handle your vinyl with care. We realize that everyone already knows you should never pick up a record from the middle of the playing surface. But in case you haven’t heard, don’t do it! You work too hard keeping your vinyl clean to put your oily fingerprints all over it.
- Be gentle when placing a record into its sleeve. Dropping it in causes damage to the sleeve and negates its purpose: to protect your precious vinyl.
- Stack your records vertically. Stacking them horizontally in a big pile can cause them to warp over time.
- Utilize the queuing lever on your turntable. Instead of trying to pick up the tonearm with your hand, the queuing lever will allow you to place the stylus without scratching the record.
- Put your records away immediately after use. The last thing you want is for your dog or cat to think that your favorite recording is now their favorite chew toy.
- Use only approved cleaning fluid on your vinyl. Harsh chemicals and solvents have no place in any strategy for preserving your record collection. They only serve to damage the vinyl and ultimately degrade the sound quality.
- Wait for the record to stop spinning before picking it up. If you try to pick up the record while it spins on the turntable, you run the risk of scratching its underside.
- Try to stick with microfiber cleaning cloths. Never use paper towels, rags, or an old t-shirt to dry your records. These items are abrasive and can easily scratch the vinyl surface.
What About Storage Options?
There are a lot of great ways to store your records. Here are just a few ideas.
- If you only have about 20 to 30 records in your collection, the Victrola Wooden Record Crate is a good start. It has an attractive, vintage wood look to it that will go with nearly any decor.
- There are also some great options for transporting your collection. The Evelots LP Vinyl Record Carrying Cases come in a set of three and are a unique way to haul around your collection while protecting them. They are made of a clear PVC material that allows you to see your labels, which makes finding what you want to listen to much easier. There is also a zipper for easy access.
Final Thoughts
There is a right way and wrong way to clean your vinyl. Hopefully, in this guide, we’ve shown you the 11 best ways to keep your collection free of dust, dirt, and damage.
Keep in mind that it’s not just about collecting more stuff to impress your friends and make you look more like a real collector. You invest a lot into your stash of records, so you want to protect your investment.
That’s why you want to use a combined approach when cleaning your cherished vinyl. It gives you the best chance for overall success in preserving your collection.
Recommended Reading